As a kid, I always wanted a Power Wheels. Perhaps it was the cool commercials on TV. Little did I realize that keeping them charged was a giant pain! I decided there must be a better way.
The solution was simple, a Power Wheels Solar Charger. The version described below doesn’t involve any welding or soldering. If you can cut PVC pipe, you can build this.
What size solar panel do I need?
Generally, you want the largest solar panel that will reasonably fit on the battery powered vehicle. The larger the solar panel the quicker the battery can be charged.
Keep in mind, solar panels are rated under ideal conditions. Don’t expect to get the rated power from your panel.
For example, I have a 50 Watt solar panel on a Power Wheels Jeep Hurricane. The highest charging current observed so far is ~2 Amps. That works out to be 24 Watts (12 Volts x 2 Amps), essentially half the rated output of the panel.
Nonetheless, this 2 Amp charge current will in theory charge a 10 Amp-Hour (Ah) battery that is completely dead to full charge in just 5 hours. (10 Amp-Hour / 2 Amps = 5 Hours). In most situations, the battery won’t be completely dead and the charge time will be even shorter.
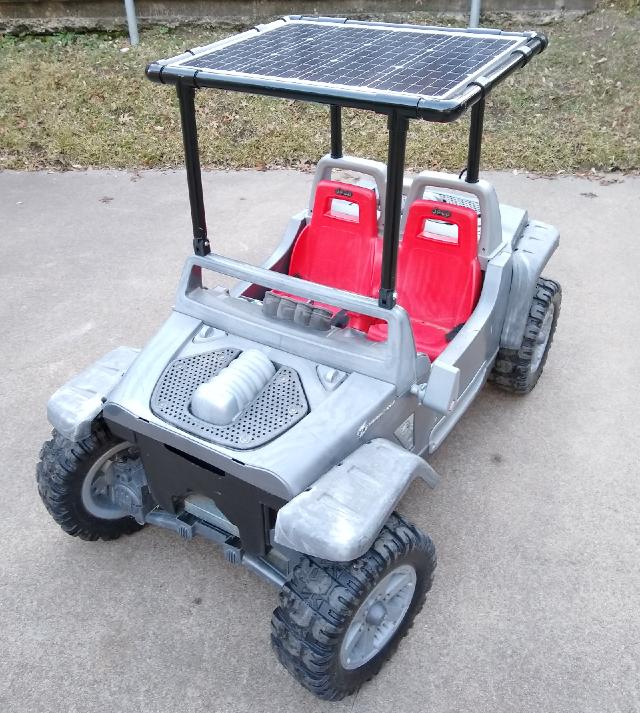
Parts You Need for a Power Wheels Solar Charger
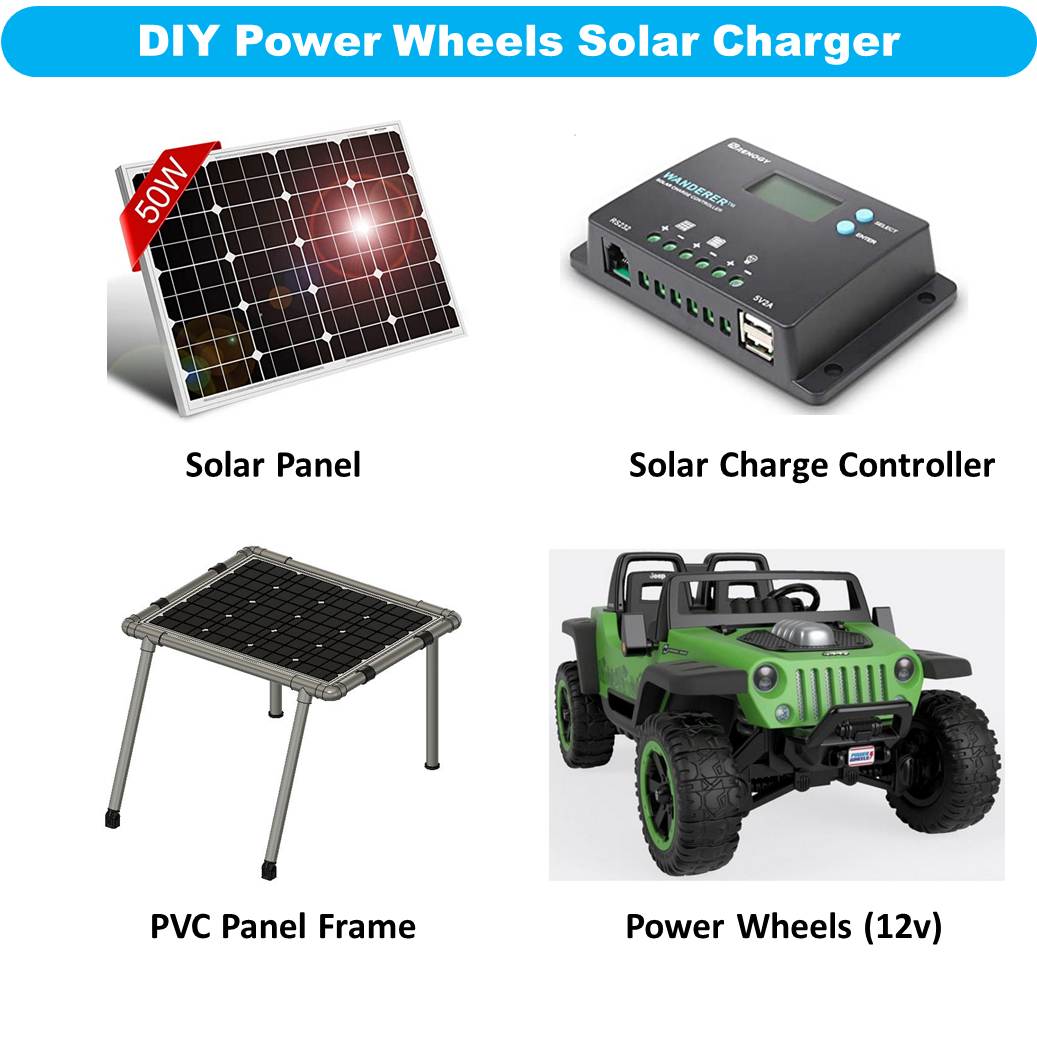
The solar charger only requires a few components.
- Solar Panel – Converts the light energy from the sun to electricity
- Solar Charge Controller – Conditions the electricity from the solar panel to the appropriate voltage and current to charge the vehicle battery.
- Wire Harness – Connects the Solar Panel to the Charge Controller and Battery
- PVC Pipe Frame – Secures the Solar Panel to the Power Wheels
How Much Does a Power Wheels Solar Charger Cost
You can expect to pay between $100 and $150 for a solar charger install on your kiddos electric ride on vehicle.
Note the following are affiliate links. If you choose to purchase using one of the links below DIYMachining.com will receive a small commission at no additional cost to you.
Solar Panel ~ $60

Solar Charge Controller ~ $20

Wire Harness ~ $20 (depending on wire length)

PCV Pipe Frame ~ $20
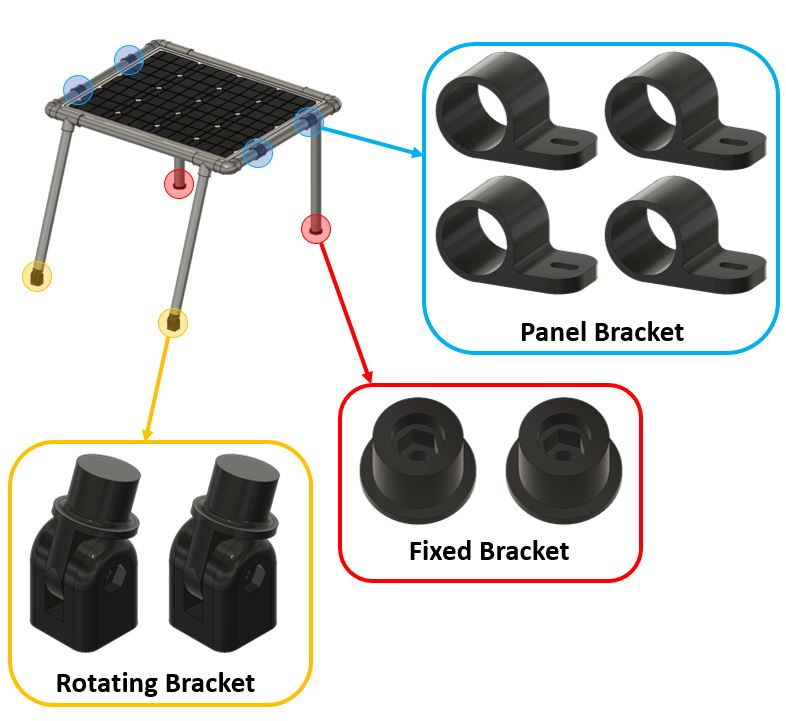
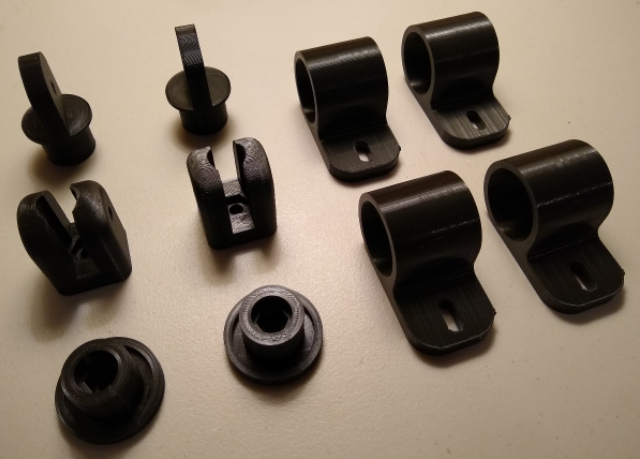
I used 1″ schedule 40 PVC and fittings from the home center. Your frame may look slightly different depending on the Power Wheels you have. I also 3D printed brackets to attach the frame to the vehicle and attach the solar panel to the PVC frame. The 3D printed brackets are compatible with standard 1/4″ hex hardware available at your local home center. I used the nylon lock nuts given the amount of abuse and vibration expected.
The CAD files (.stl) can be downloaded by clicking the following link:
3D Printed Brackets for Power Wheels Solar Charger
Note there are two versions of the “Fixed Bracket”, one fits the inside diameter of 1″ PVC pipe where the other fits the inside diameter of 1″ PVC fittings.
Unfortunately, the “Panel Brackets” sagged in the Texas heat. Granted these were only printed in PLA. A more durable material like ABS would hold up better in the heat.
Nonetheless, if I were to build this again, I would use “Cushion Clamps” to connect the solar panel to the PVC frame.

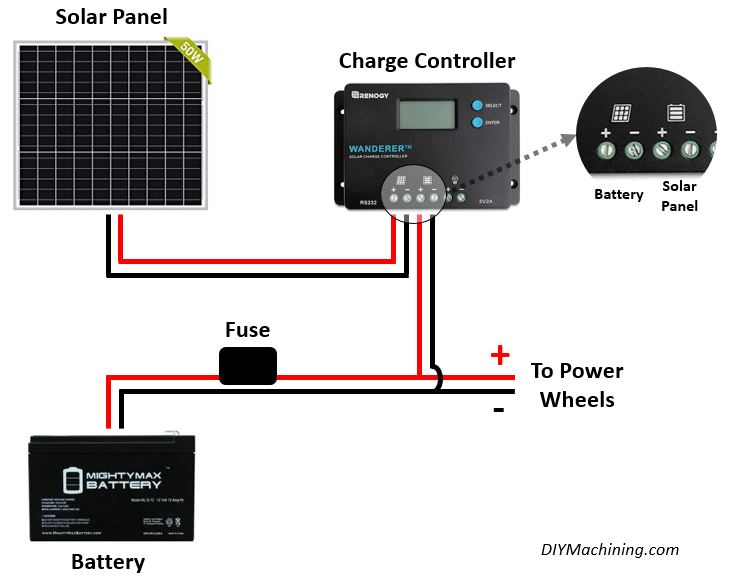
After the frame was constructed, then I added the wiring per the following diagram.
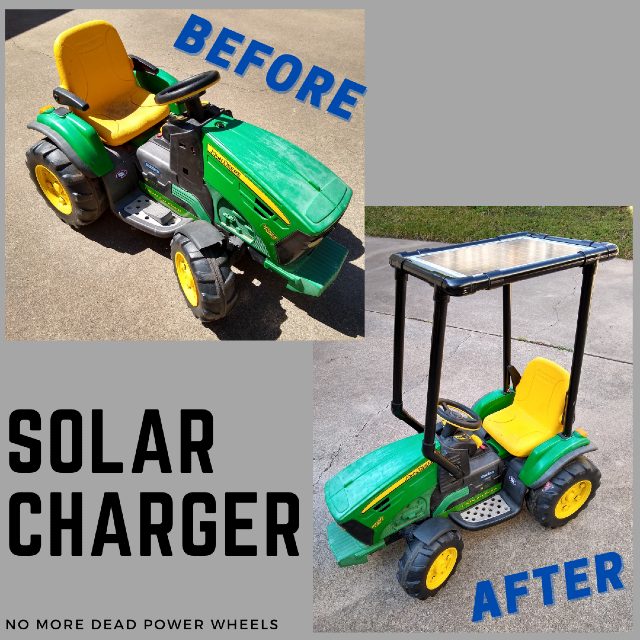
Power Wheels – I recommend getting these second hand locally. Craigslist and Facebook Market Place are a good place to start if you don’t already have a vehicle. Look for the 12V variety. Often, I find mine at no cost given by the time the battery wears out, the kids are usually to big for the vehicle. Another example of a Power Wheels solar charger is the John Deere ride on tractor I converted. This version uses a 30 Watt solar panel.
Optional Battery Upgrade – Often the second hand Power Wheels need new batteries. I have found these to be reliable replacements. Keep in mind, if you go this route, you will need to replace the OEM battery connector with female spade wire connectors.

Final Thoughts
Wow, that’s a bunch of information to digest. If you have any questions or get stuck along the way feel free to e-mail me Tim@diymachining.com
Good luck with your project. I would love to hear how it turns out. Leave a quick note in the comments below.
Thanks for reading. Until next time… Tim
