
I know, I know… I went to the dark side! To be quite honest, I wish I had done it sooner. The Creality Ender 3 Pro is the best entry level 3D printer I have seen.
You are looking at the proud owner of a Creality Ender 3 Pro 3D Printer. I purchased the used printer at the beginning of 2021 and I cannot stop using it! (Note – I figured a year of using the printer was a sufficient to provide a reliable recommendation.)
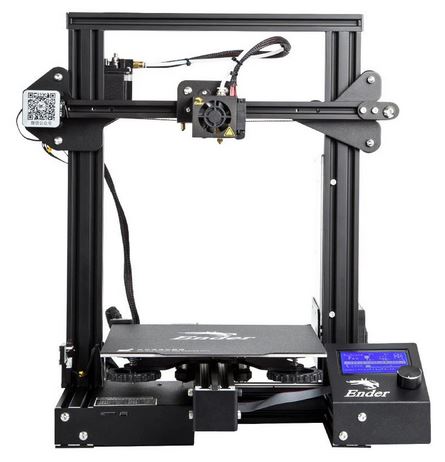
Nonetheless even at the full retail price of a new printer, I highly recommend the Ender 3 Pro. Click the image below to see the latest price from Amazon.

Affiliate Disclosure – Note some of the links on this page are affiliate links. If you purchase a product using one of the links, DIY Machining earns a small commission. There is not additional cost to you compared to purchasing directly from the linked site. Click here for more details about how we use affiliate links.
Best Entry Level 3D Printer
What makes the Ender 3 Pro by Creality such a good choice as an entry level 3D printer?
1. Cost – For under $250 you can try your hand at 3D printing
2. Simplicity – The Ender 3 Pro isn’t packed with complicated features to overwhelm a newbie
3. Ease of Use – The magnetic build plate makes removing prints a snap
Now, I did have a problem getting my initial prints to stay flat on the magnetic build surface. Turns out, when I purchased the printer, the previous owner dropped the magnetic build plate on top of the glass build plate just to make sure I received all the parts. Well, you can imagine the magnetic force was significantly reduced since it was sitting on top of the glass. This cased the edges of my prints to pull the magnetic build plate off the glass and warp as the prints cooled and new layers were printed. This was 100% user error. I didn’t even know the glass build plate was on the printer. Once I removed the glass build plate and stuck the magnetic build plate directly to the bed of the printer, I was in business!
The following is an image of the magnetic build plate. Note the text “Ender” and logo.
The next image shows the glass build plate. Again, note the text “Creality” which is different from the magnetic build plate.


The heated bed of the Ender 3 Pro does not have any text or logo printed on the surface. Do not print directly on the bed of the printer. Always use wither the magnetic build plate or the glass build plate. If not, you risk destroying the bed of your printer.
My go to build plate is the magnetic version. Once I set the bed height and leveled it, my prints stick reliably to the surface of the magnetic build plate.
3D Printing Work Flow
3D Model (.stl) – Slicer – Gcode (.nc) – Printer
How to Get Started
1) Buy a 3D printer. (I highly recommend the Ender 3 Pro as the best entry level 3D printer) Click here to buy Creality Ender 3 Pro 3D Printer
2) Buy some filament. Start with PLA (Polylactic acid) This is the easiest filament to use when getting started and works very will in the Ender 3 Pro. Black is a versatile color. Click the image below to buy a spool now…

3) Level the bed. This is a critical first step to ensure your prints (specifically your first prints) will stick to the bed. I recommend you download the CHEP_M0_bed_level.gcode from Chuck Hellebuyck (aka CHEP). CHEP has an excellent page that details how to level the bed or your printer.
4) Print a Temperate Tower. Many people are tempted to skip this step. It’s a short print that will save you lots of time and frustration in the future. Click here to download the “Ender 3 PLA temp tower easy” file from Thingiverse. Once you printed the temperature tower, you examine the print an can determine the best temperature to use for all of your future prints with the same filament. I print a temperature tower for every new type and brand of filament I use.
5) Print a Calibration Cube. If you must skip a step, you can skip this one as long as you come back and do this at some point… The calibration cube allows you to to fine tune the dimensional accuracy of your printer by adjusting the steps/mm for each axis of the printer. The XYZ Cube is available here from Thingiverse.
6) Print a Benchy. This feels a bit like a right of passage, the benchmark “Benchy” file is available here again from Thingiverse. Select the “3DBenchy.stl” It took me several tries to get my first benchy to print. If I had followed the steps outlined above, I would have saved myself considerable time and frustration.
What to do first…
I am confided you have several ideas on what to print. Feel free to share your prints in the comment section below…
Let me know if you have any questions or feedback in the comments section below… As always, feel free to contact me directly at Tim@DIYMachining.com
Thanks for reading. Until next time… Tim